Selecting an Image Section
The template designer may give you the option of selecting a section of the image. In this case, the  button is displayed on the previews for the images. If you click the button, the Crop Image dialog box opens.
Note
You only change the size of the visible section of the image. The actual image box is not affected. Its size is defined in the template.
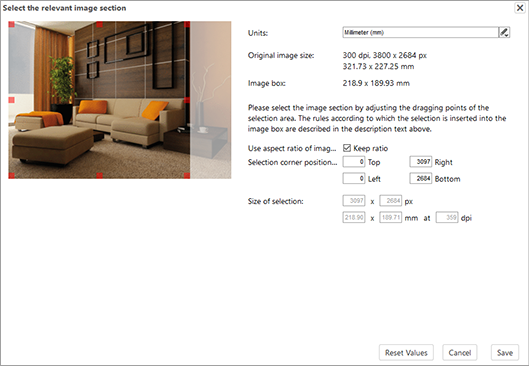
First, select the length unit in which you want to set the image section in the top list: millimeter, centimeter, or inch. The size of the original image and its corresponding image box are displayed below that. The preview displays a frame with the image section that is currently set. The frame is initially the maximum possible size with the aspect ratio that the box has in the document.
Move the frame on the image and use the drag point to change the size until you have selected your desired section. Note that in the default setting, the aspect ratio of the frame is retained.
If you want to change the aspect ratio, deactivate the Keep ratio checkbox and select an appropriate size. Note that this may lead to white space in the box. Therefore, test the setting: leave the Crop Image dialog box and refresh the view. The box now displays the new sections.
After you make your selection, the Position of selection area shows the positions of the upper left and lower right corners of the frame. The resolution in dpi and the size of the area in pixels and in the selected length unit are displayed below that.
Choose Save to confirm your selection and return to the document editor.